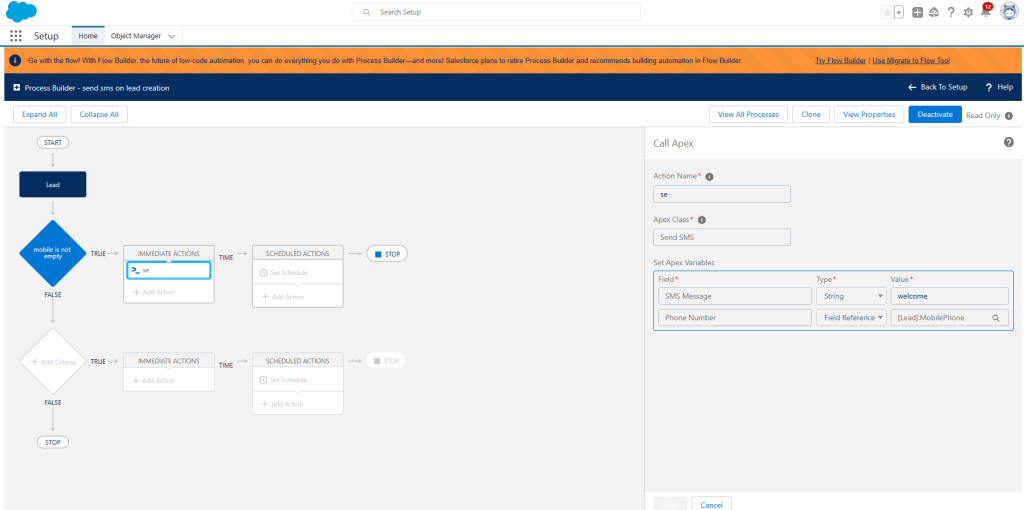
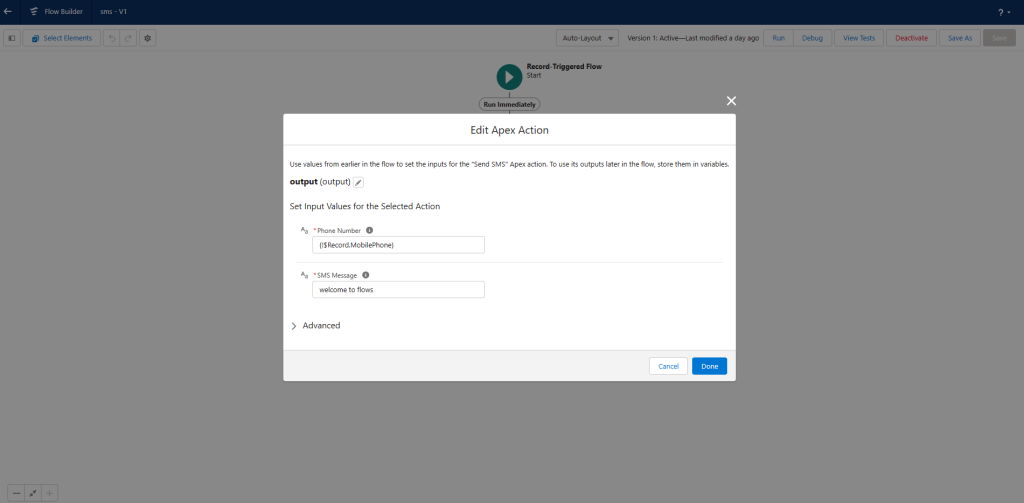
Automated messaging allows you to send SMS or WhatsApp messages automatically based on certain triggers or criteria in Salesforce. You can set up these automations using Process Builder and Flows. Here’s how:
Using Process Builder:
- Create a New Process: Navigate to Setup -> Process Builder -> New.
- Define Criteria: Select the object and specify the criteria that must be met for the action to execute.
- Add Action:
- Click on “Add Action”.
- For “Action Type,” select “Apex”.
- For “Apex Class,” choose “Send SMS”.
- Configure Inputs:
- For “Phone Number,” map it to the relevant field on the object.
- For “SMS Message,” you can either hardcode a message or map it to a field on the object.
- Save and Activate: Once configured, save the process and activate it.

Using Flows:
- Create a New Flow: Navigate to Setup -> Flows -> New Flow.
- Add Elements: Use the Flow Builder to add elements that define the automation logic.
- Add Action:
- Drag an “Action” element onto the canvas.
- For the action type, search and select “Send SMS”.
- Configure Action:
- Map the “Phone Number” and “SMS Message” fields similar to how you would in Process Builder.
- Save and Activate: Complete the rest of the flow, save it, and then activate it.

Important Notes:
- Make sure you have the correct API Key, Bulk Token, and Conversation Token in the CRM Messaging Custom Settings for these automations to work properly.
- Always test the automation thoroughly before deploying it to production.
By setting up automated messaging, you can efficiently communicate with your customers or leads based on triggers, enhancing your overall CRM strategy.


